
the ability to use jump rings is an essential skill for anyone making their own jewelry. whether you're making earrings, bracelets, or necklaces, jump rings come in handy as a go-to method of attachment for just about anything other than stretchy bracelets.
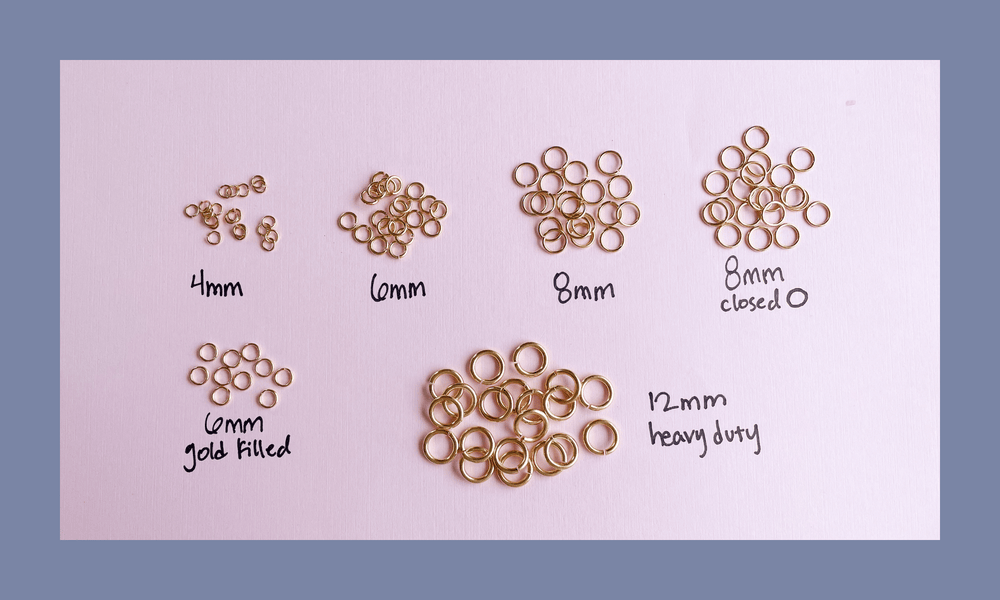
if you are creating a piece that requires a jump ring to attach segments of chain, wire-wrapped beads, or other closed materials, you will need to use open jump rings. we also add jump rings to charms to make sure that they orient themselves the correct way in your design, or to add more length to a charm. pictured above are our shiny gold open jump rings; available in 12mm, 8mm, 6mm, & 4mm. closed jump rings, which are soldered shut, are really only necessary for finishing off a necklace that is using beadalon & crimps.
when opening your jump ring, it is imperative that you twist the jump ring in a north/south direction instead of east/west.

pulling your jump ring open the wrong way will cause unnecessary wear & tear to the metal, which could cause it to snap eventually. it also makes it much harder to get the ring back to its original circle shape! jump rings can be opened & closed with two pairs of pliers, two pairs of crimpers, or a combination thereof.

while your jump ring is open, connect your chain, clasp, pendant, or whatever else you may be attaching.

once your jump ring is holding the necessary pieces, close it the same way you opened it - north to south. it should line up pretty perfectly, but if it doesn't, take some time to work with your tools to make it match up as best as you can. this is just an overall good practice that will increase the longevity of both your jump rings & your pieces as a whole.

for more information + a video tutorial, click the image below.

products used:
shiny gold open jump rings, 4mm, 6mm and 8mm